Exposure compensation most of the time may sound very technical and unfamiliar to many new photographers. Exposure compensation, commonly also known as EV is actually very simple and useful, where I believe should be put to good use.
What is camera exposure compensation?
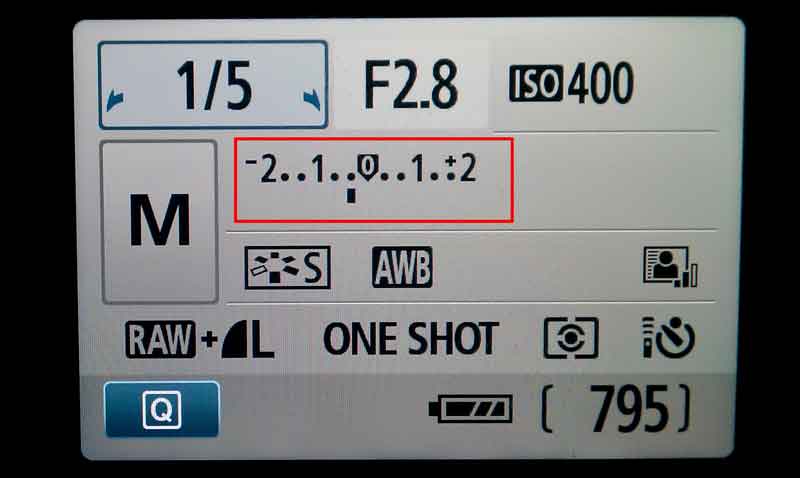
EV allows you to easily underexpose or overexpose your images. EV can be applied regardless of whether you are using manual mode, program mode, aperture, or shutter priority mode. The common basic option is + or – 4 stops in steps of 1/3 or 0.3.
Depending on the light conditions, you will dial down (-) if you wish to underexpose or darken the image and dial-up (+) if you wish to overexpose or brighten the image.
The theory is nothing if it cannot be put to good use. Now let’s move on to the interesting part of this article where I will share some of the applications of exposure compensation.
Believe many new photographers like shooting landscape for a start. Most likely you will use aperture priority which a small aperture. This will let your camera decide on an appropriate shutter speed to garner balance and proper exposure. On a bright sunny day, a commonly used trick is to dial EV -0.3 or lower to underexpose the photograph. This technique will produce a darker sky and more dramatic clouds which make the photographs more eye-catching.
Under very low light conditions, your photographs may appear a little too dark despite having them properly exposed. An easy trick is to dial up the EV to +0.3 or higher to deliberate overexposure to the photographs.
Camera exposure compensation for HDR

High Dynamic Range (HDR) is very popular among many landscape photographers. You can make use of EV to produce images for HDR with ease by having 1 image with an exposure decided by your camera, 1 image with EV +2, and the third image with EV -2 (with the rest of the settings remaining constant). Combine the 3 photographs using software to produce a beautiful HDR photograph.
If you want to learn more about HDR go to this post-High Dynamic Range explained
As you learn digital photography, you will find terms that will make you wonder what the world means. One of them is the exposure compensation and sometimes also as aperture compensation or Ev. A technical term, but if you understand, it will help to make some of these good pictures big.
When to use it
One always has a problem when taking pictures that are containing a lot of white or were quite dark. They come with dark pictures too light grey or too dark. What one notices is that the camera did its own thing. That is, the light meter was deceived by the conditions and made its own decisions. Mostly they are great, but sometimes they just do not do it right.
The light meter of the camera is not very smart, so you always try to bring all the colors in a scene to 18% grey. It does not work with you but has its own agenda. This works well most of the time, as long as there is not too much white, then it is deceived and does its own thing.
How to use camera exposure compensation
On your camera, you will find a setting or button called Ev or a small icon with a +/- sign. Change the exposure settings here. What do you need to change and how does it work to improve your photos?
- If your camera’s light meter detects all white in an image, it is assumed that there is too much white and the image is overexposed to compensate for it and underexpose the photo. Exactly what you do not want.
- The setting chosen for the aperture is therefore incorrect since less light hits the sensor of the camera.
- This results in a muddy or grey image because not enough light is admitted through the lens.
- To improve your picture, you need to compensate the camera’s light value with the Ev setting.
- Depending on your camera, the compensation measurements or stops are measured in thirds or halves as known.
- If your scene is white like snow, add a stop or a fraction of a stop so that enough light reaches the sensor.
- Manually open the lens hood and override what the camera’s light meter thinks.
The same applies to a dark or black image. You do the opposite by stopping a third, half, or full aperture. Here the camera thinks that it is too dark and opens the aperture.
The proof is in the pudding, they say. You can do it right the first time, or it may be necessary to change this setting until your photo is acceptable. As I learned how to use my exposure compensation, my photos have dramatically improved. It was my discovery of the year. If you learn digital photography and experiment with these settings, you’ll get better as well.
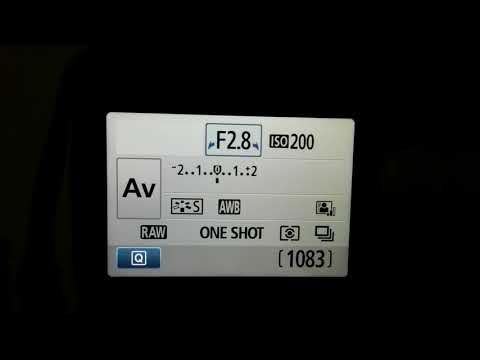
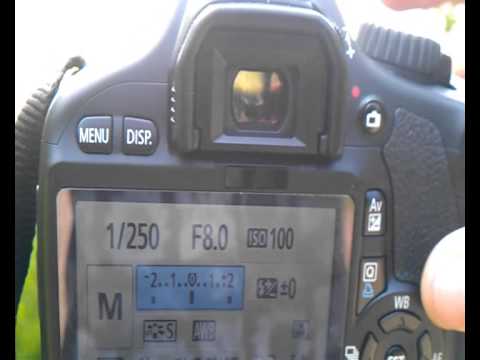
This is an example of using it on Canon 550d or T2i
First press the Av button
Then while pressing adjust settings with the main dial
Auto bracketing mode
There is another feature on your camera that can virtually fix this problem every time. It means taking extra pictures every time you press the shutter button. It’s called AEB or Auto Bracketing. What it does is. You select the desired amount of compensation, about one-third of a stop, and the camera locks it down by selecting a normal image, one-third of a stop, and one-third of a stop. So, when you press the shutter button, three shots are taken, one for each of your selected exposure settings. It’s like insurance and you get a chance every time. Again, you have to experiment to see if a third, half, or full opening works.
You should know why you should your exposure compensation. Sometimes you may wonder why there would be a reason to adjust anything in your camera as it is already working well. To start with the camera may be confused by some conditions that are present. The meter works by viewing the tones in its view and leveling them out to 18% grey.
If you just need a little more time for digital photography, your pictures will greatly improve under these circumstances. Take a look at the manual of your camera to see exactly how the exposure compensation and bracketing work on your particular camera. Happy shooting!