How to create timelapse video from images using DSLR
What is to create timelapse photography?
It is making movies from sequence images.
If you decided to create time-lapse you will need:
- Digital camera DSLR
- Tripod
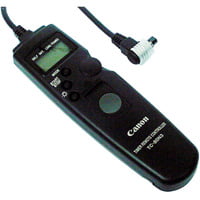
- Camera timer remote controller – intervalometer
Timelapse photography tips
First, choose the place, choose the time, pre-think how long your video will be. I would prefer non less than 20 frames per second (fps) speed or more for smooth movement. Let’s say you want 30 seconds of video, 20frames per second so 30*20=600 images. It depends on your idea what spaces between each image will be, for slowly moving objects like a ship sailing in the river, sunrise, moving clouds over the city panorama I’d prefer about 5 seconds, for fast-moving objects I’d prefer shorter time. How long it takes me to do a job? 600 images *5 seconds equal 3000 seconds, divided from 60 seconds (one minute in seconds) will be 50minutes. It means it takes me 50 minutes to do a job and I will get 30 seconds of video timelapse at 20fps.
What camera mode to use for time-lapse?
Well, you can use Av mode or M mode. But what is the difference?
Shooting time-lapse on Av mode
Av mode on a DSLR camera is semi-automatic, I mean you can adjust the aperture value and all the rest will be left for the camera. Overall photographing time may become long enough and light over a day may change several times. But today cameras can measure: how long the shutter should be open to capture normal images,- in short words it has its own internal extensometer. So all images made using this mode will be plus-minus the same looking at the overall light perspective. Here is what I mean like a real example
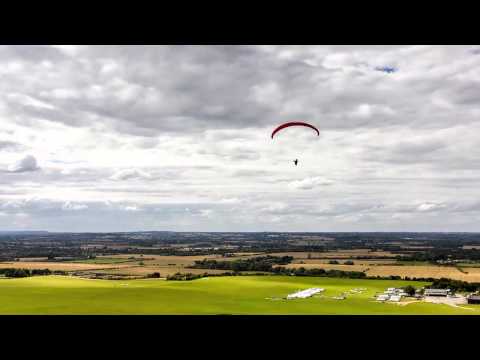
Sorry for the shaking video, the wind was very strong that day…
Shooting time-lapse on M mode
M mode on DSLR camera is full manual. What you set is what you get. Make several images before start shooting to set exposure correctly. You may want to check my Understanding exposure tutorial for this.
Here is a real example using manual mode
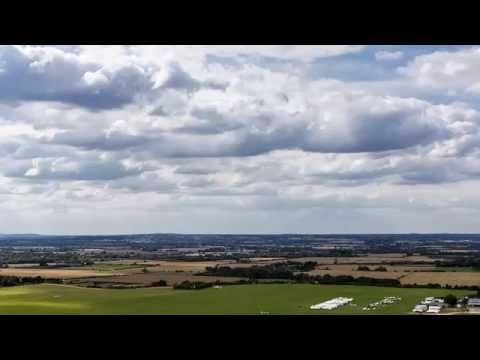
See how the sun goes down? And you can recognize it is an evening at the end, which you could not say in the first video.
By the way, both of these videos are made on different days, yes I’ve made one video one day and another second video example (Saturday and Sunday). Both made from 14:00 to 18:00 time, just to show you the difference between camera modes while shooting time-lapse.
What image format I should choose for timelapse?
If you will shoot in RAW you will be able to adjust white balance and other settings for better quality, but then you have to have a big-size memory card. If you will shoot jpg adjust the white balance before you start. Resolution 1280*720 enough for HD video.
Most times I was making timelapse I was using Av mode on my Canon eos 550d. First Focus your view. When your camera is on a tripod and the remote shutter is on then press the shutter button halfway to focus, after turn off autofocus on the lens mechanically, I am turning off image stabilization also because my DSLR is on a tripod. If it is daytime adjust the aperture to about f8. Enter the values in the timer remote which is described before and you are ready to press the start button.
After you upload your images to the computer it is time for a retouch. Change white balance, contrast, vibrance, crop, colors until you think you did the best, use software that allows you to copy all settings from one to all your images.
What software I can use to create timelapse
Canon eos users may try Magic Lantern firmware
http://www.magiclantern.fm/
For MS Windows OS some of them are free, some paid.
JPGAvi Shareware (paid)
http://www.ndrw.co.uk/index.php?f=shareware/jpgavi/index
Quick time PRO (paid)
https://support.apple.com/downloads/quicktime
Virtualdub (Free).
Just go to ‘File -> Open -> Image sequence’ and select your first photo.
Then make adjustments and ‘Save as AVI’ (you might want to use a codec, ‘Tools->Compression’).
That’s it!
www.virtualdub.org/
Sony Vegas (paid)
http://www.sonycreativesoftware.com/vegassoftware
Avisynth (Free)
I’ve been using avisynth as a frameserver to virtual dub mod.
Avisynth has a lot of inline options. I use this script:
ImageSource(file=”PIMG_%d.jpg”, start=3258, end=10036, fps=60)
LanczosResize(720,480)
Levels(16,.8,255,0,235)
First line sets the file names to use and FPS.
Next is the resize, and finally a quick levels adjustment. If you know what you’re you can get some very advanced stuff done.
www.avisynth.org
Google Picasa 3.0 (Free)
Google Picasa 3.0 has a Time-Lapse movie function. Super easy to use… just select your files, create a movie, select Time Lapse as the transition effect and adjust the slide duration. Allows you to export as a movie file in many different sizes, or straight to youtube.
http://picasa.google.com/
Adobe Lightroom (paid)
By default you can make 10 fps only, that is why I prefer to download LRTimelapse preset from
http://lrtimelapse.com/download/
Adobe Premiere/After Effects (paid)
http://www.adobe.com/downloads
Windows movie maker (free if you are using Windows OS)
Or there is another way to make timelapse. You can make a video with a digital camera or DSLR and change speed by video edit software.
If you do not have a DSLR or digital camera you can make it with your phone as well, just download the right app for your phone.
I hope so you understood what is timelapse photography. The first time is hard to understand, but the second looks very simple. If you have any questions contact me I will be glad to help.
This timelapse created with Adobe Lightroom 3.6 and lrtimelapse
Good luck with the experiments and have a nice day.